AuthorTopic: 300TDI Cambelt Change Step By Step With Pics  (Read 72530 times)

0 Members and 1 Guest are viewing this topic.

Offline solihull-mick

  • Posts: 986
  • Attack: 100
    Defense: 100
    Attack Member
  • Karma: +0/-0
  • Referrals: 0
300TDI Cambelt Change Step By Step With Pics
« on: November 05, 2008, 17:01:12 »
Whilst doing a cambelt change today i took the liberty of taking pics as i go,

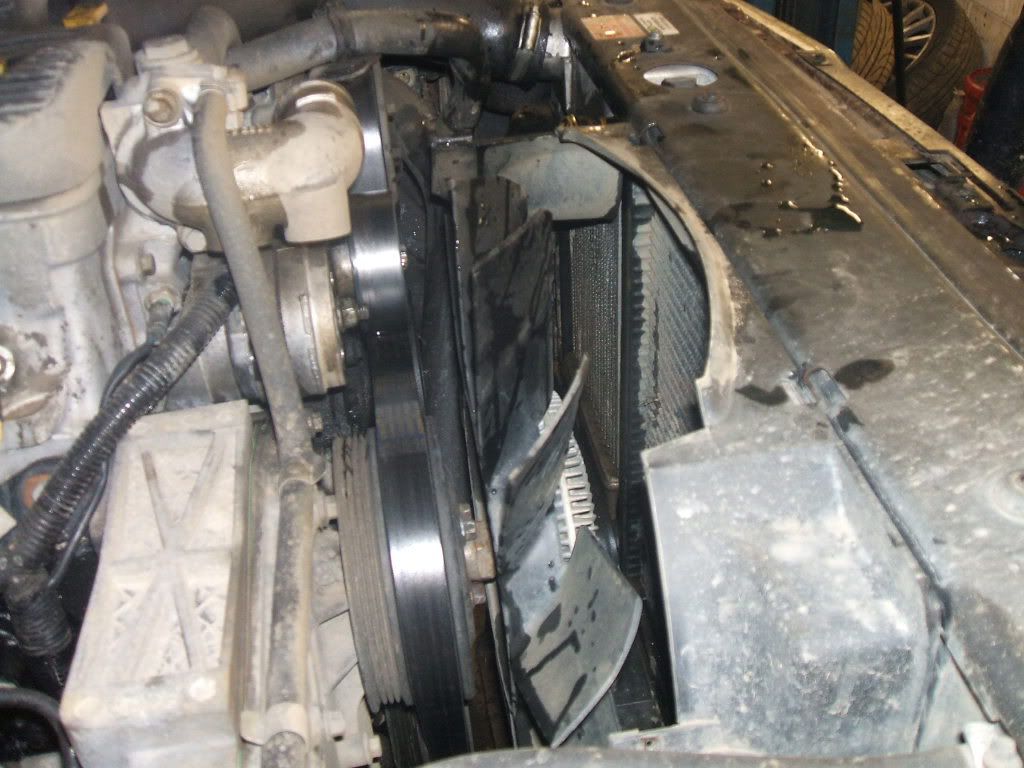
Remove the top part of the fan shroud,small spring clip drivers side of ther cowling


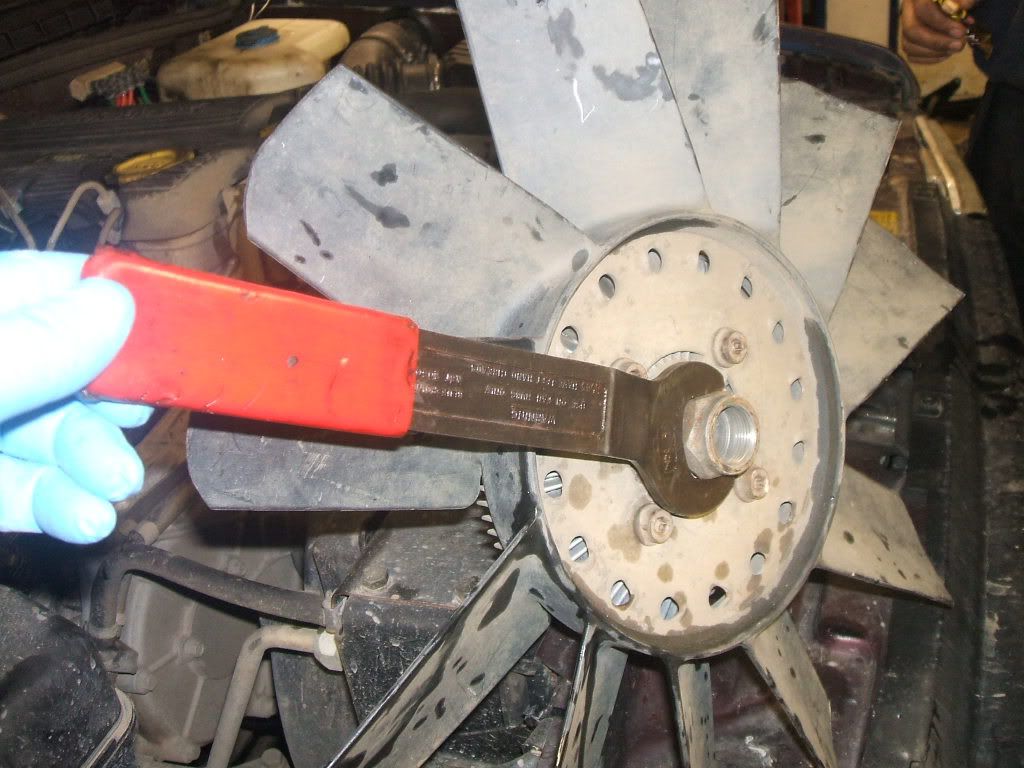
Remove the fan hub. this is left hand thread, undo is clockwise,


Remove the rest of the fan cowling,  two small metal clips at the top,unclip the coolant pipe from the lower section before you try and lift it out,


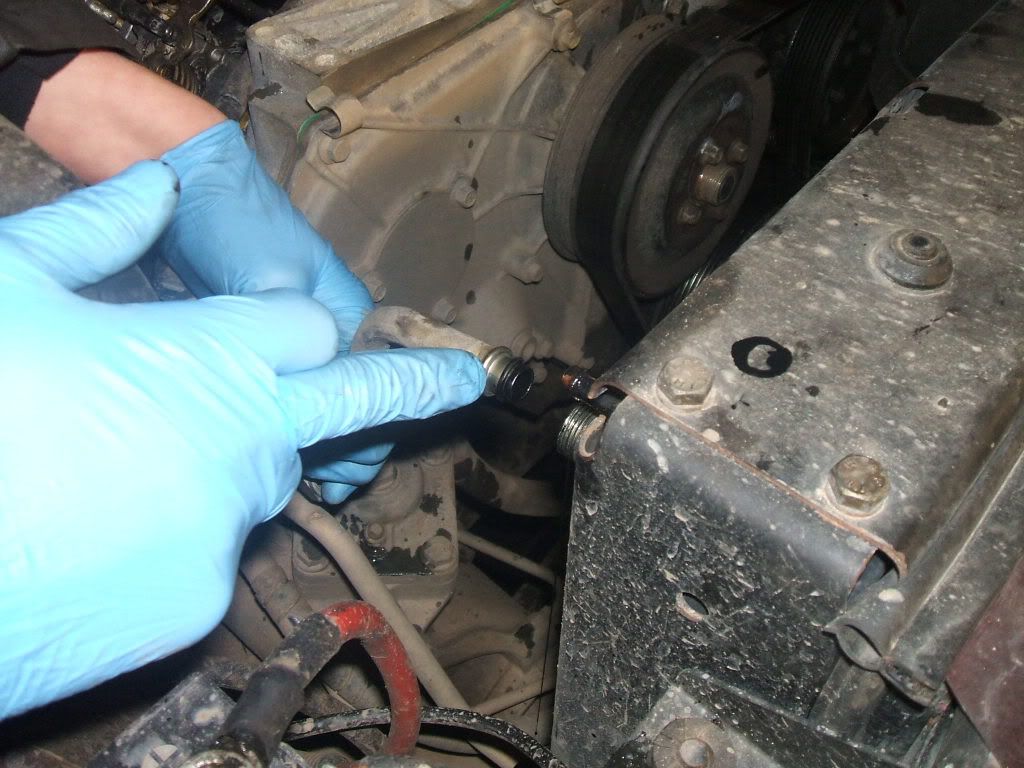
Disconnect the coolant pipes from the rad, Rad removed to show in better detail for pics, not necessary to remove rad to do the job, but hell of a lot easier


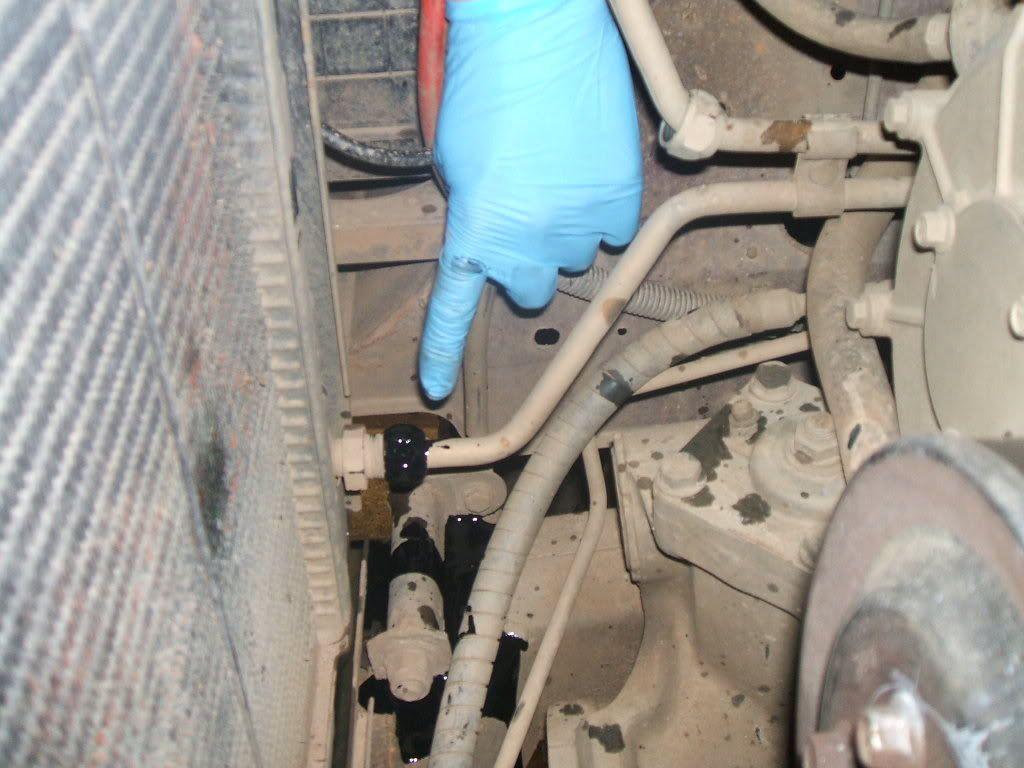
Disconnect the oil cooler pipes, you will get a lillte spilage,Do not loose the two small rubber o rings from the oil cooler pipes,


Two Brackets either side of the rad have to be removed, 13mm bolts,
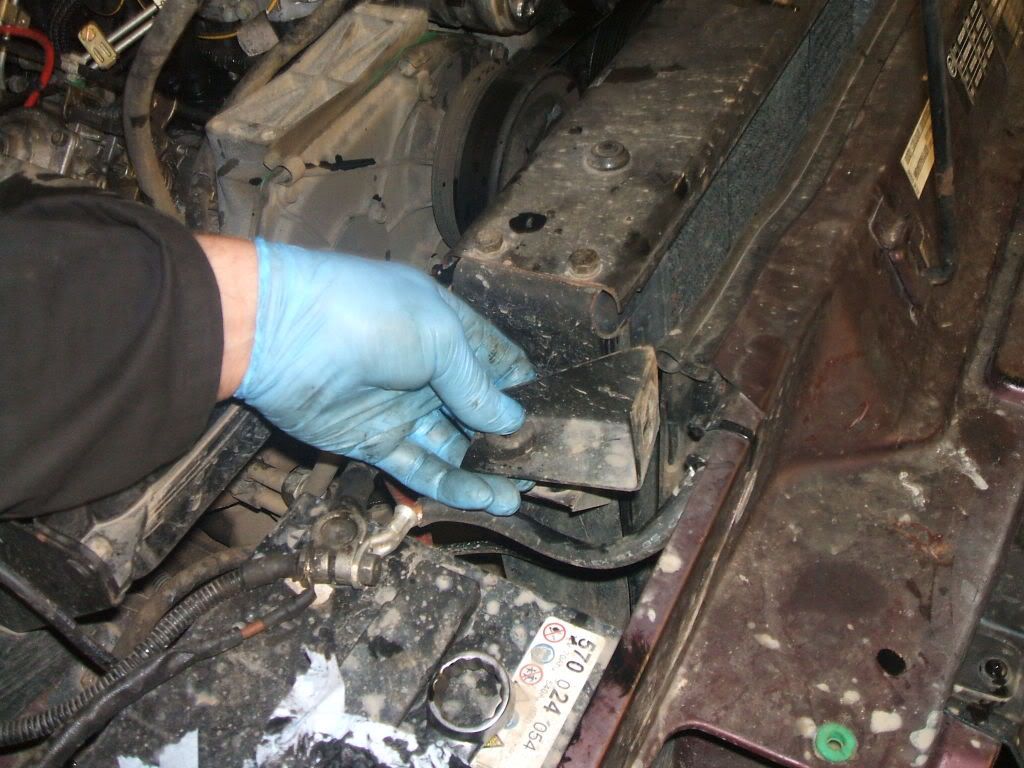


Rad removed


Remove the fan belt by lifting the tensioner with a 15mm spanner,
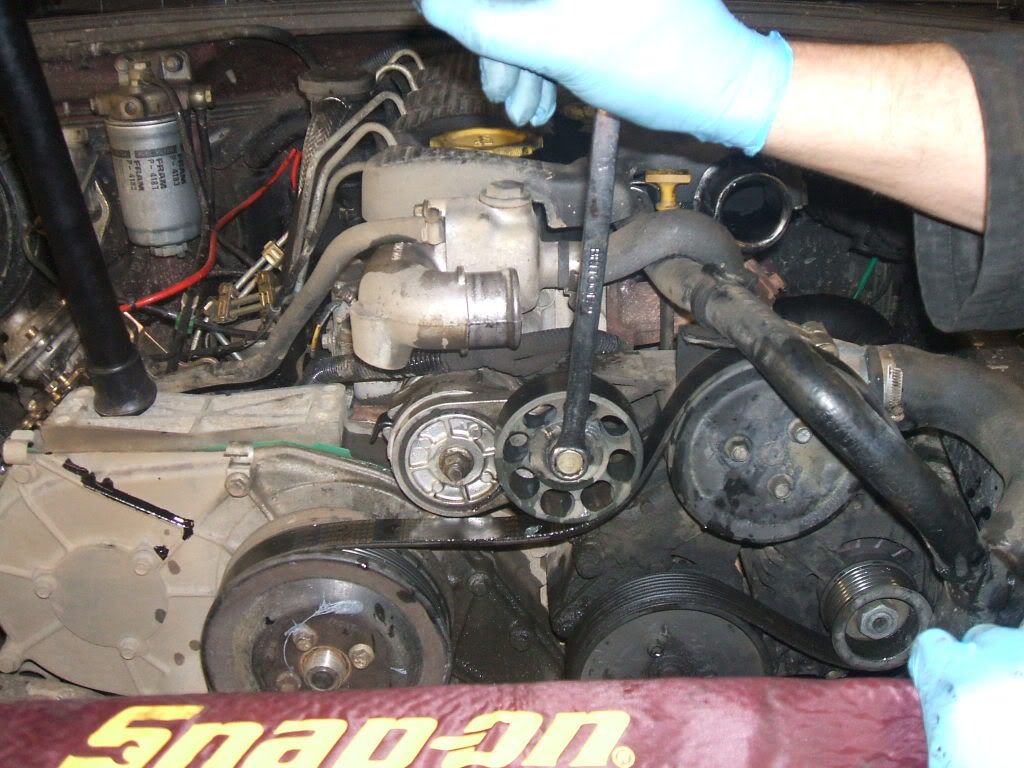


Remove the idler pulley four 10mm headed bolts
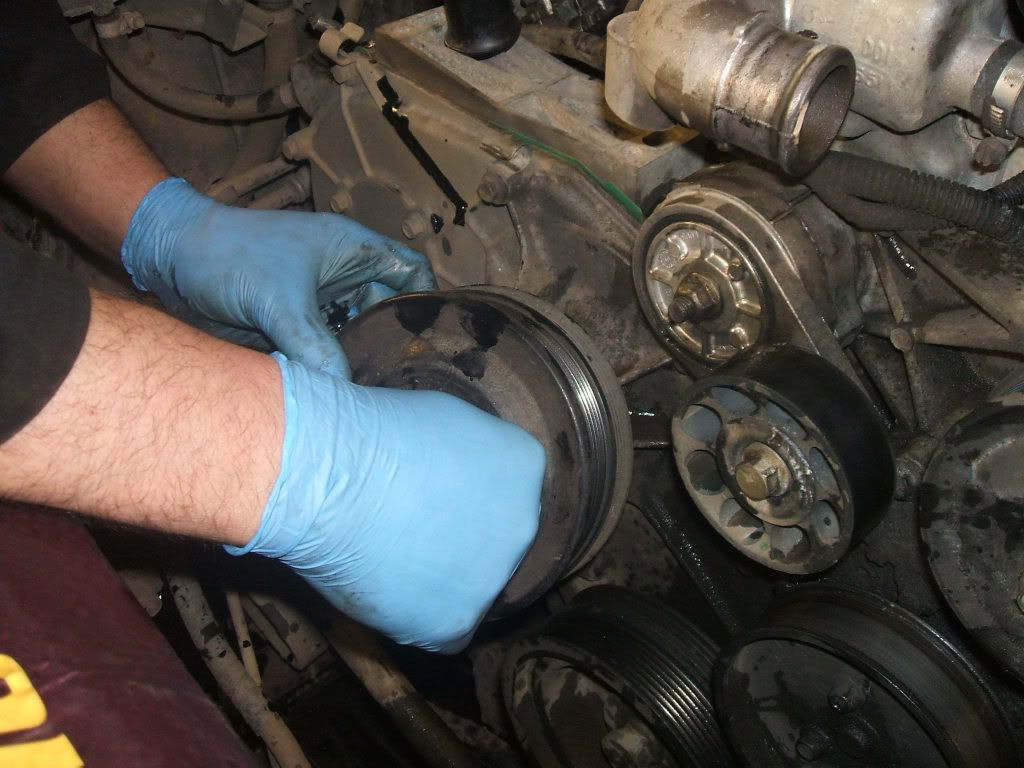


Remove the crank nut and washer, this should be very tight, 27mm socket needed,
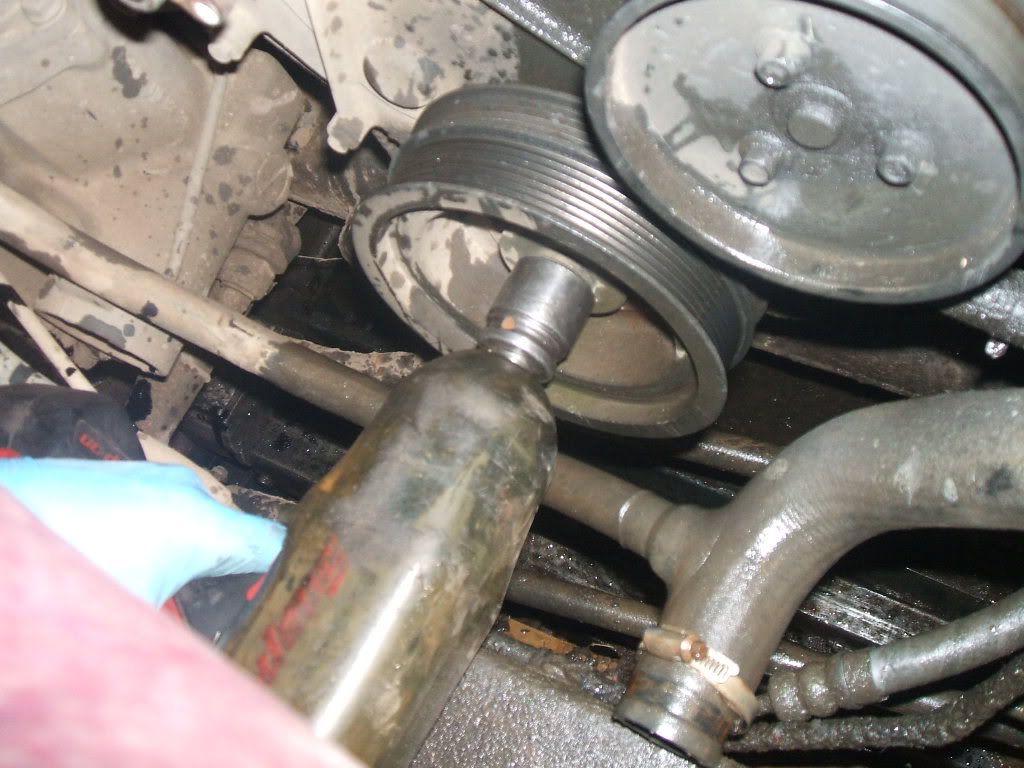


Cleaning threads in pulley
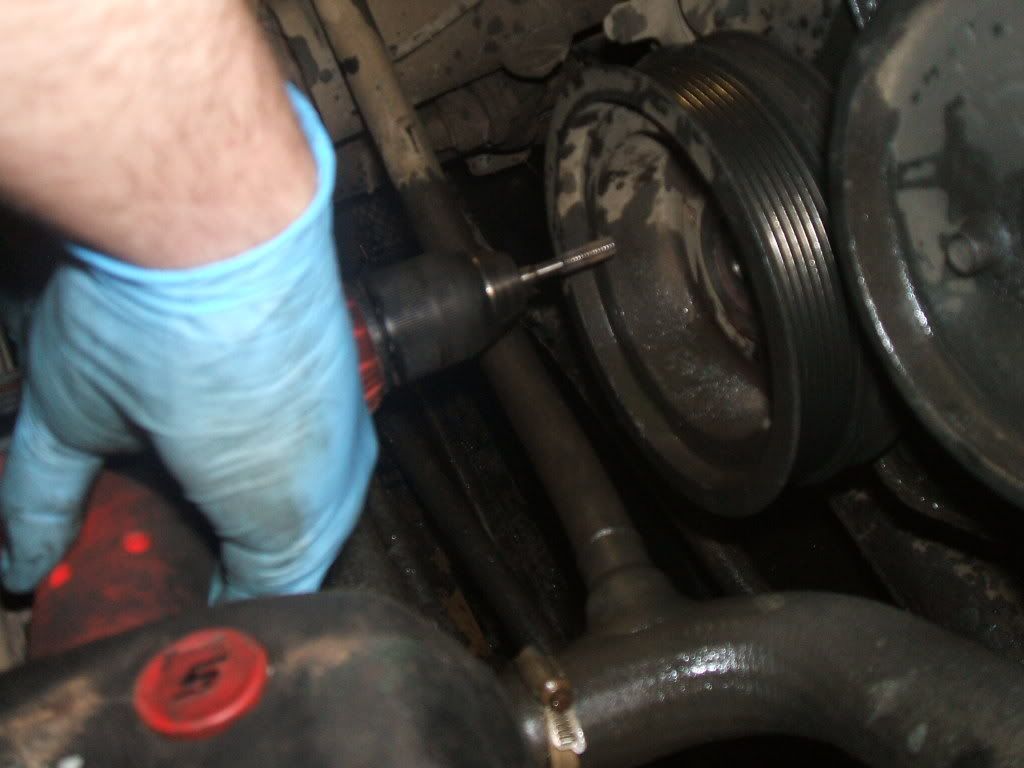


You will need a suitable puller to remove the crank damper, normally seized in place
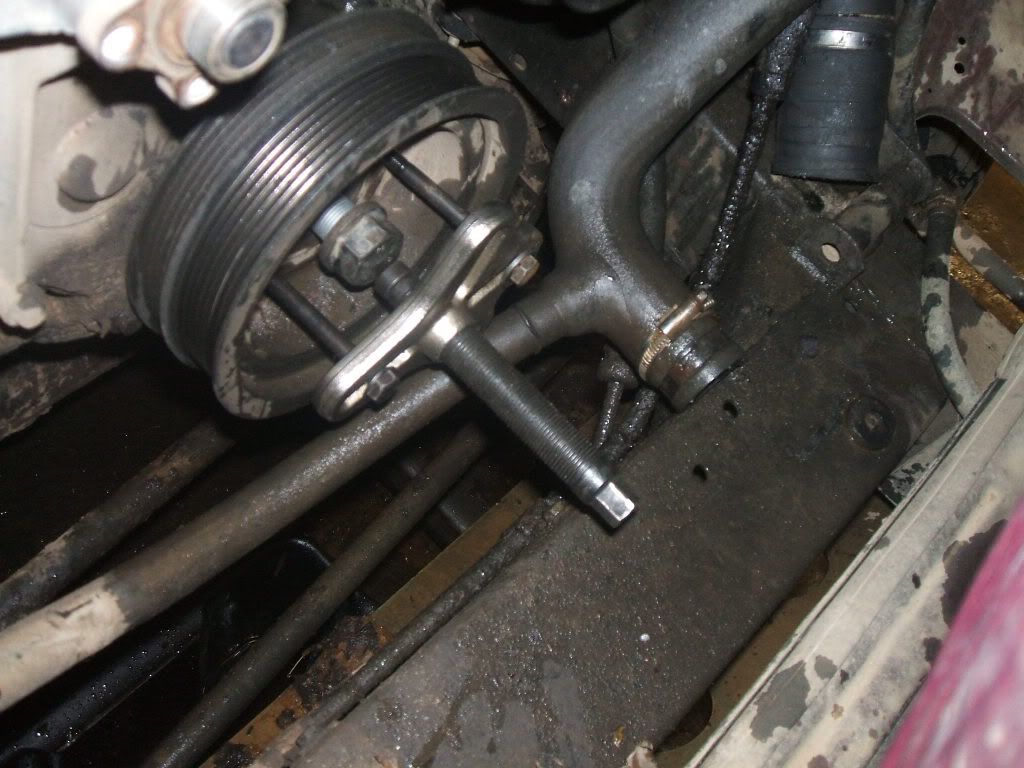


Pulley removed


Remove all the 10mm headed bolts from the timing cover
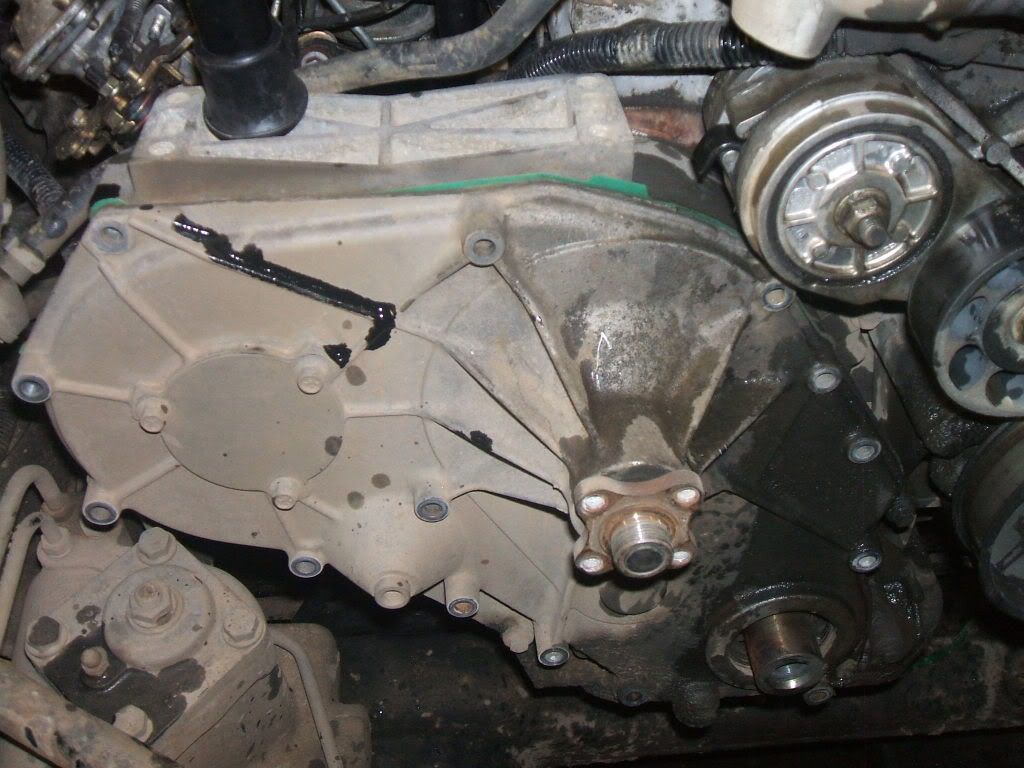


Wind the engine round in the directiom of rotation till the timing marks line up, this shows the crank marker, the woodruff key will be at the very top
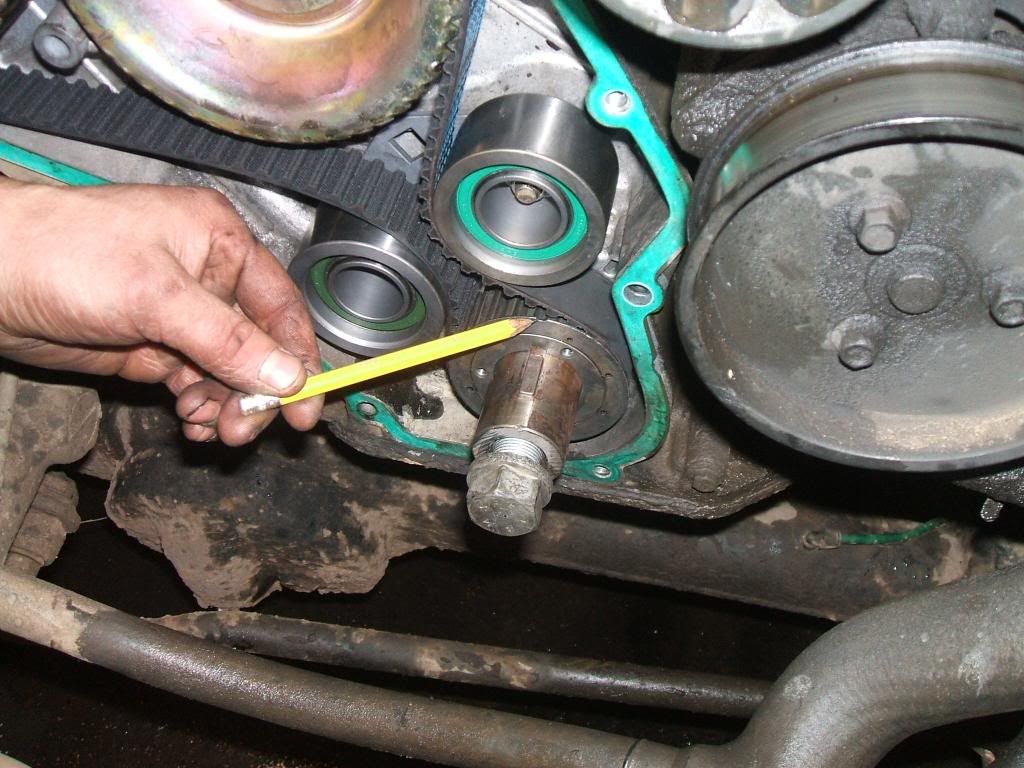


Cam timing marker is a line in the gear, that aligns with a cast pointer in the casing,
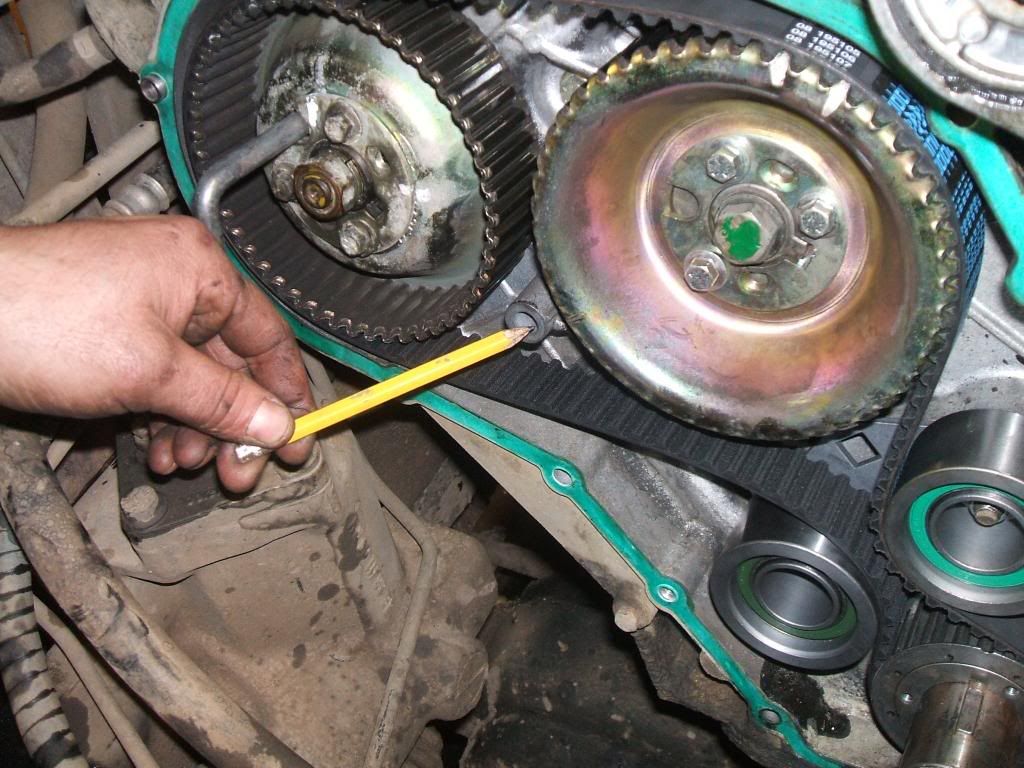


Injection pump timing is done by means of a 9.5mm pin
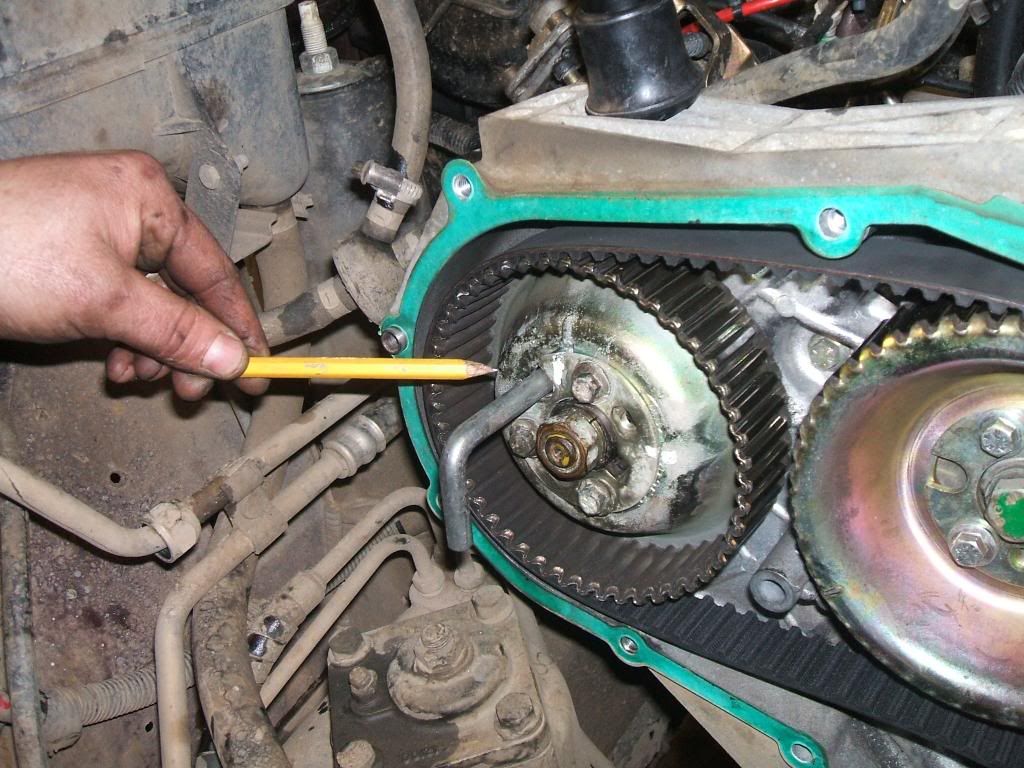


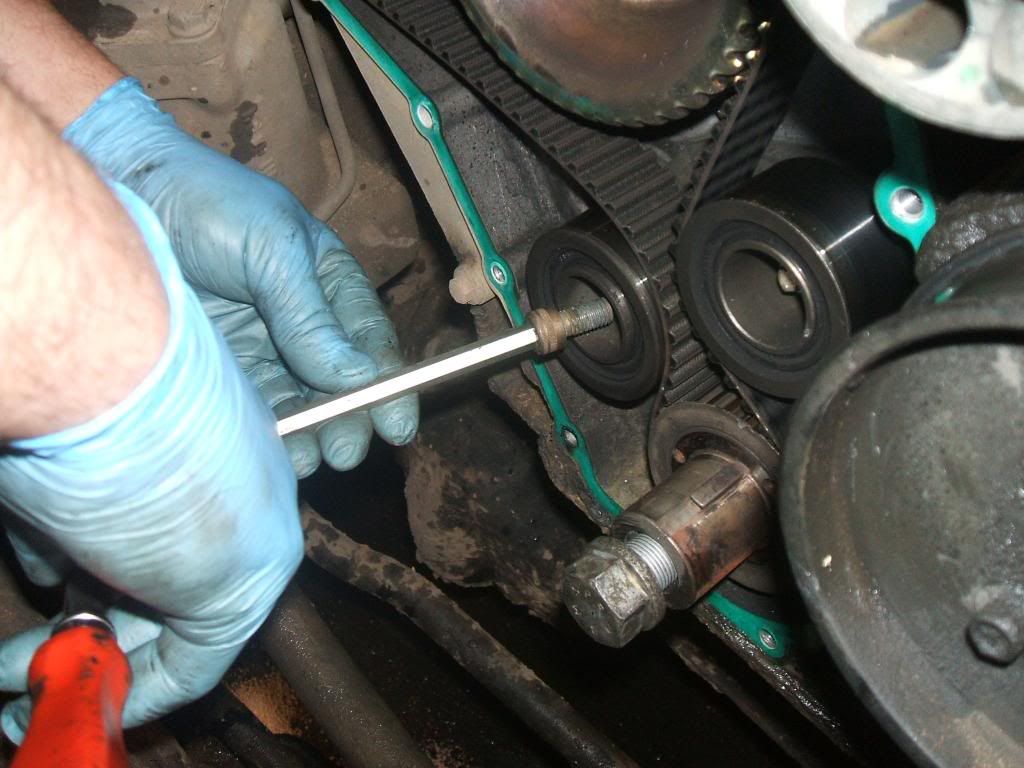
Undo the 8mm allen key in the middle of the tensioner,and discard it


Remove the 15mm nut from the idler wheel, and discard it
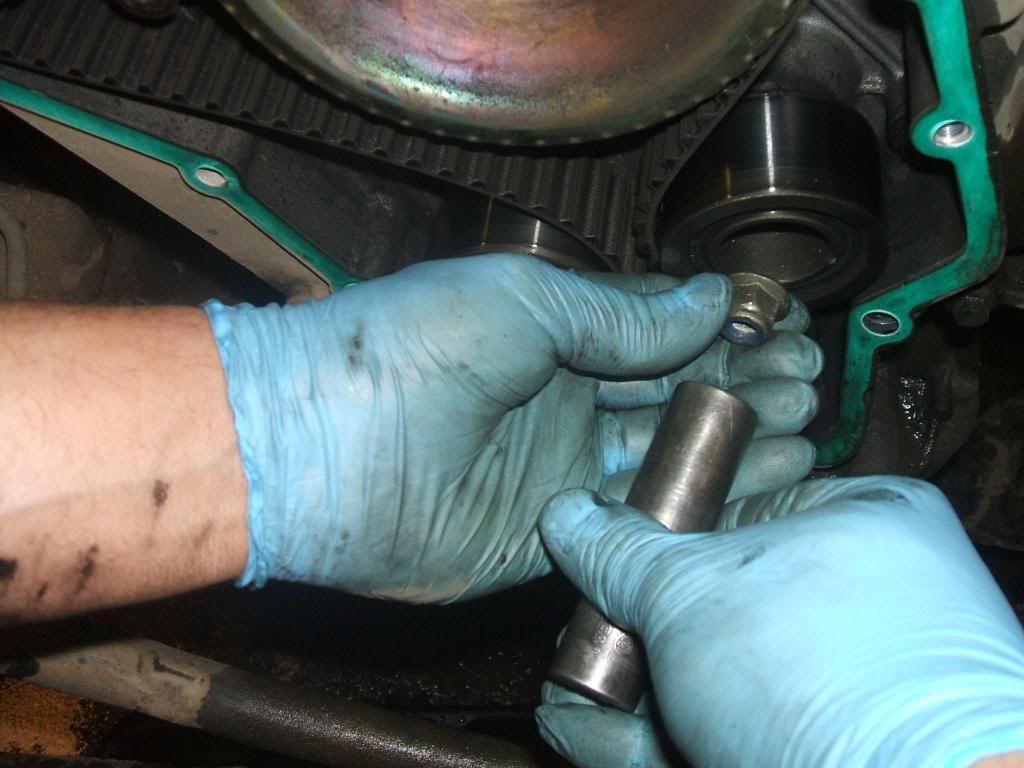


Remove the idler bearing,


Look up inside of the wading plug you will see a line in the flywheel, this should be perfecly in the centre of the wading hole, to show true TDC


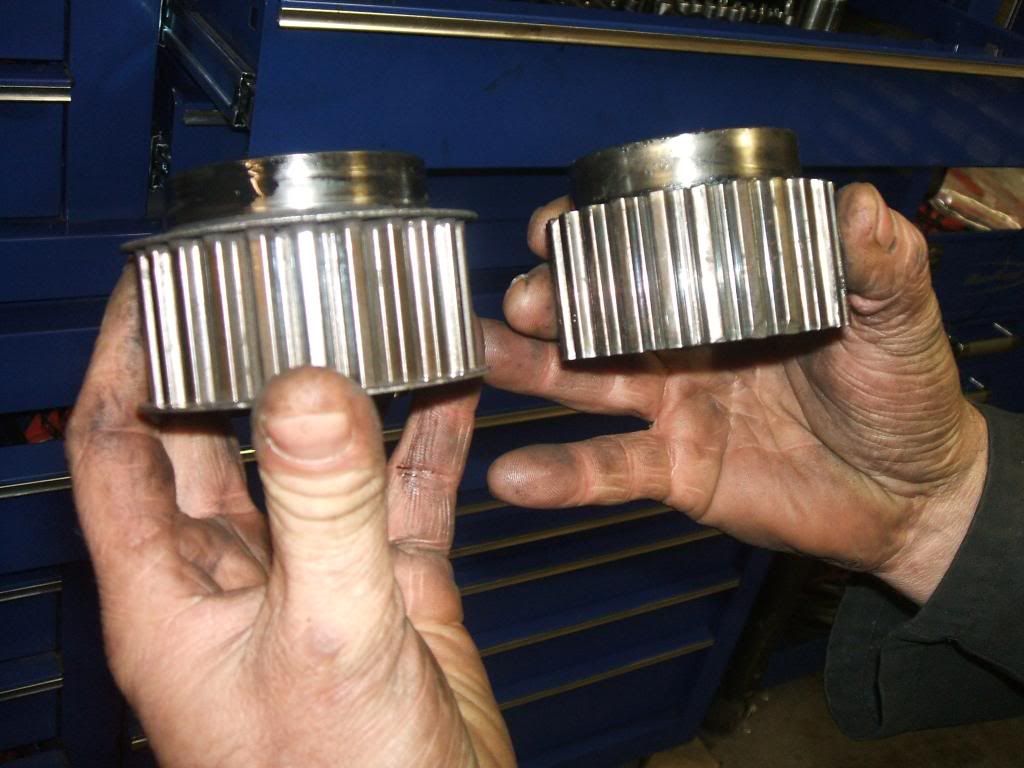
If your crank gear looks like the right hand one change it for the later type, left hand one,

Sometimes you can move the gear with a pry,
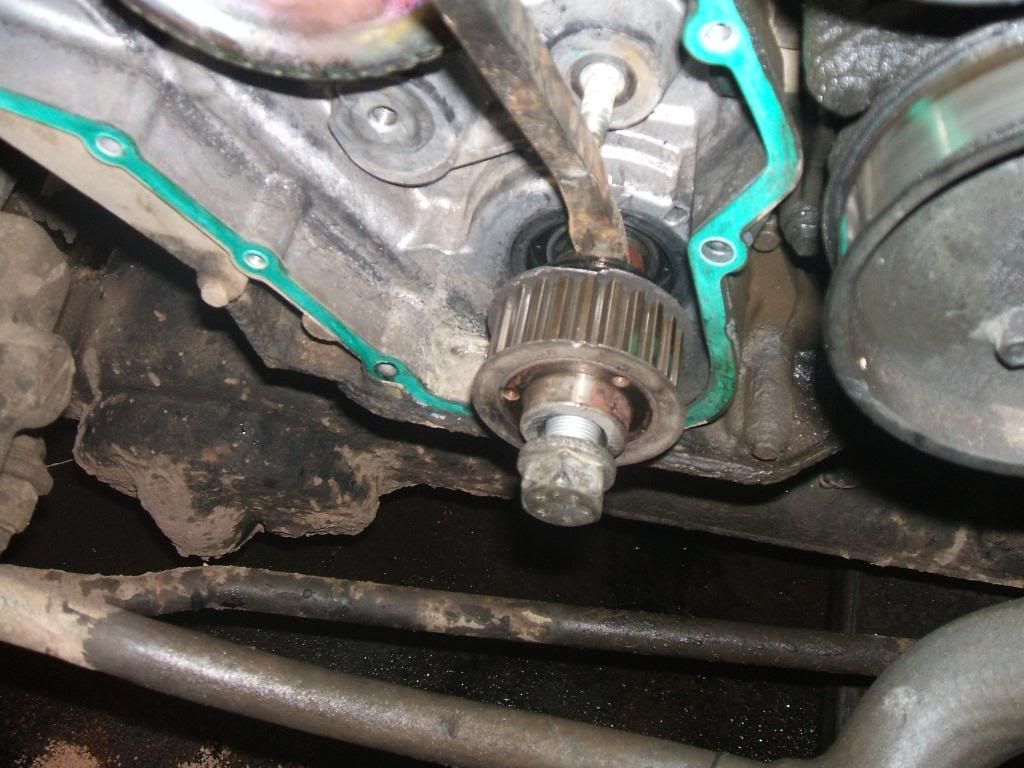


If not use a suitable puller


Replace the o ring behind the crank gear,
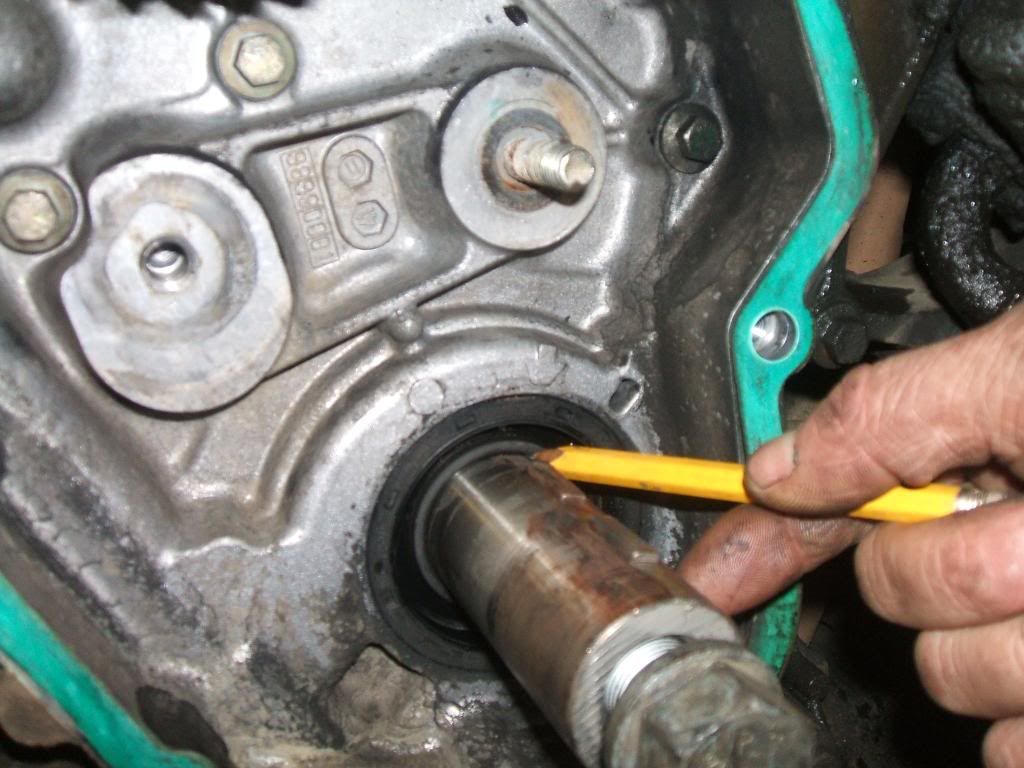


Replace the idler stud that comes in the kit,
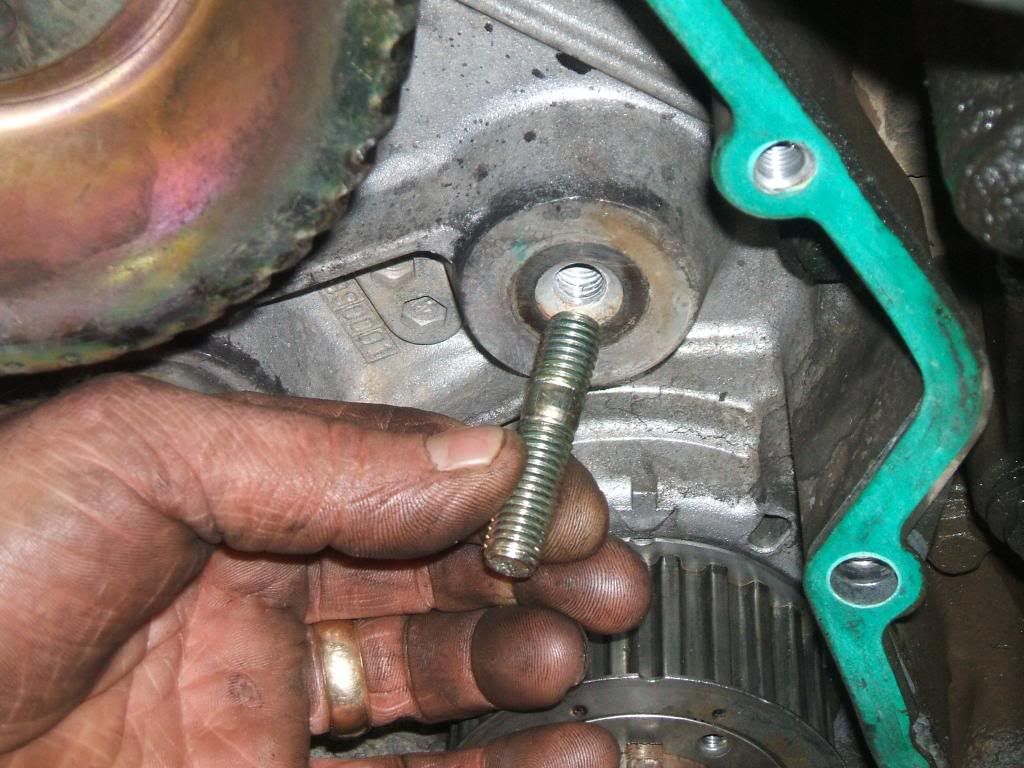


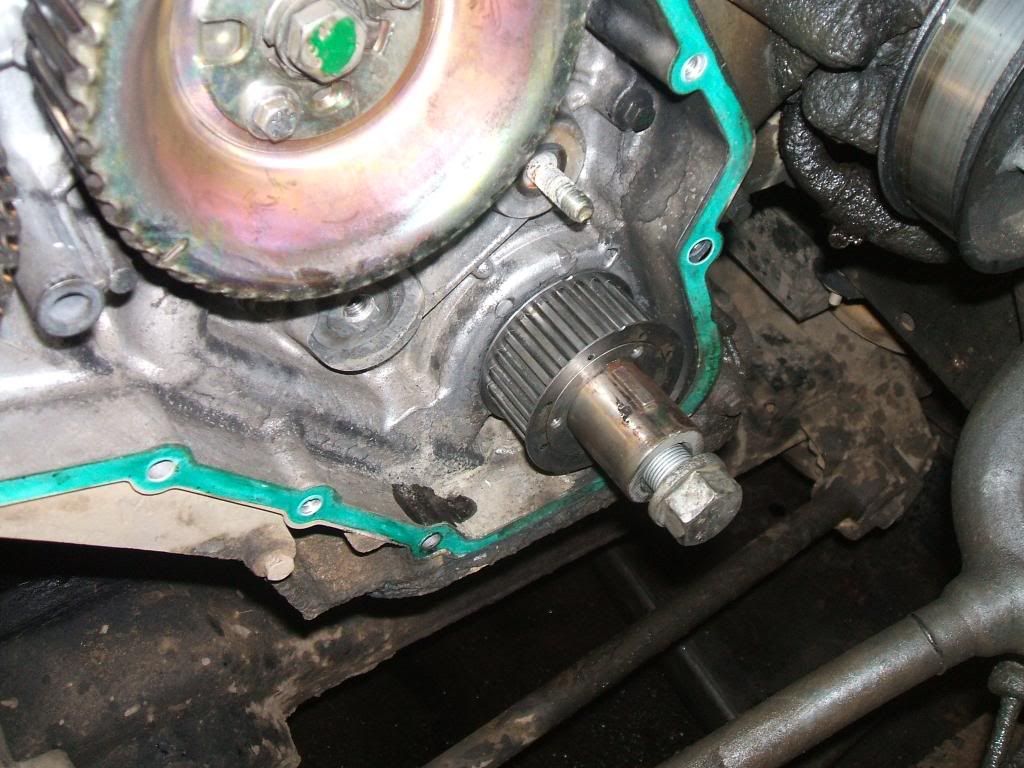
Refit the new crank gear till its all the way home


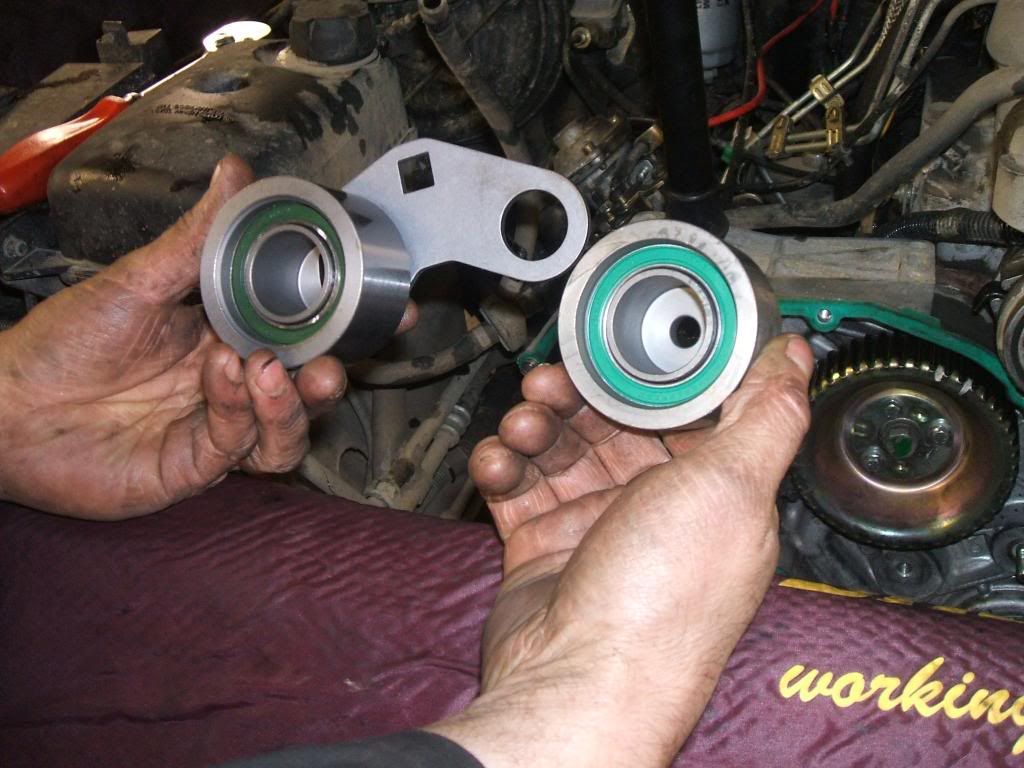
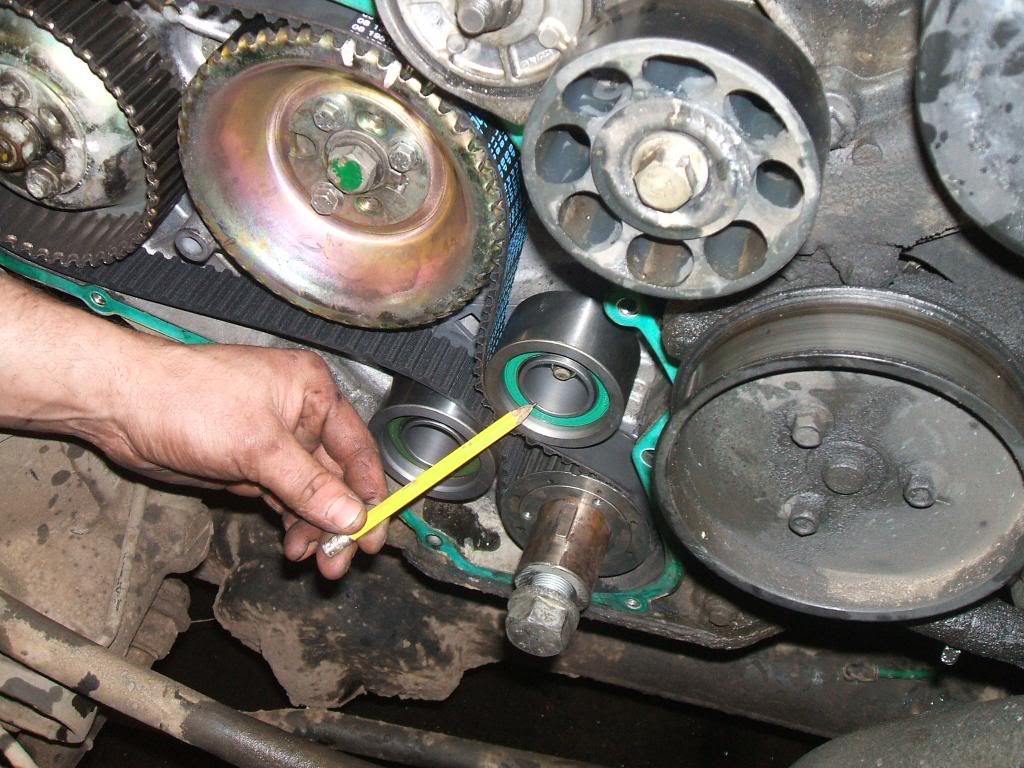
New tensioner and idler gear ready to be fitted


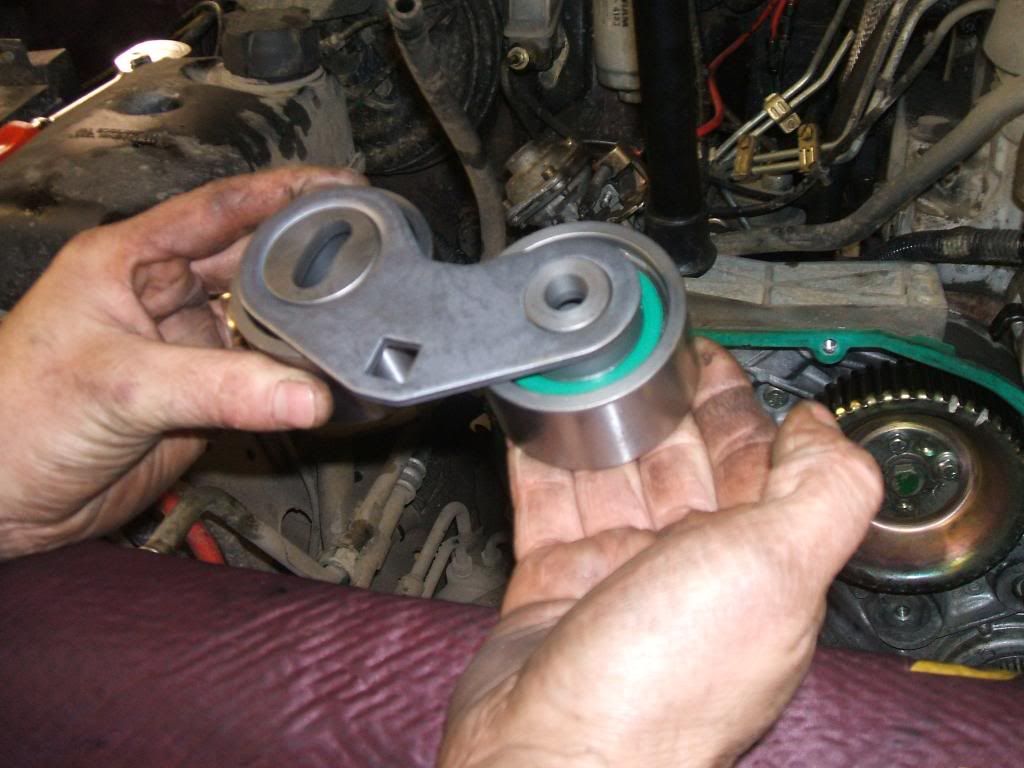
When fitted this is how they interlock,


Loosen the 3 10mm headed bolts in the injection pump gear,


Refit the new belt with the new tensioners. making sure the injection pump gear is at its max setting to the right, witht he pump still pegged, tension belt using the 1/2 inch squre hole in the tensioner pulley, not to tight, if you can just twist the belt on its longest run thats fine, make sure all the timing marks are in line, tighten the 10mm bolts in the injection pulley, wind the engine over in the direction of rotation, make sure all the marks line up again, thats job done, recheck all hardware before refitting timing cover,


More pics to follow tomorrow,


« Last Edit: November 09, 2008, 14:22:55 by solihull-mick »
300 TDI Commercial Disco, ( Recovery & Parts Hack )
Series 2A Hybrid TDI( Bessie)
Mk1 escort RS2000 (my baby)
MK6 Fiesta Zetec s (wife gets the brand new car)

Offline drfence

  • Posts: 105
  • Attack: 100
    Defense: 100
    Attack Member
  • Karma: +0/-0
  • Referrals: 0
Re: 300TDI Cambelt Change Step By Step With Pics
« Reply #1 on: November 05, 2008, 20:40:35 »
in tommorows installment can we have a bit more detail please :lol:
seat leon tdi
transit tipper
transit connect
300 tdi disco
to many vehicles!!!!!

Offline lee celtic

  • Regional Rep
  • *
  • Posts: 2680
  • Attack: 100
    Defense: 100
    Attack Member
  • Karma: +0/-0
  • Referrals: 0
Re: 300TDI Cambelt Change Step By Step With Pics
« Reply #2 on: November 05, 2008, 21:07:11 »
Brilliant write up  :clap: :clap: :clap:

could you answer one question....

How do you get the belt on ????

I had a hell of a job on the 200... the belt was new and seemed too short and was very tight...

Lee...
so many hills , so little time ....
discovery TD5
work in progress...lol

Offline Disco_Stu

  • Posts: 402
  • Attack: 100
    Defense: 100
    Attack Member
  • Karma: +0/-0
  • Any chance of a tow...?
  • Referrals: 0
Re: 300TDI Cambelt Change Step By Step With Pics
« Reply #3 on: November 06, 2008, 14:01:14 »
Great write up Mick. One of the black magic Land Rover myths busted there, bar the pullers, not a special tool in sight.

Good work.

Stu.
1994 300Tdi Disco    


Snorkel now complete.... http://forum.difflock.com/viewtopic.php?t=1906&highlight=


Offline Andy41

  • Posts: 55
  • Attack: 100
    Defense: 100
    Attack Member
  • Karma: +0/-0
  • Referrals: 0
Re: 300TDI Cambelt Change Step By Step With Pics
« Reply #4 on: November 09, 2008, 10:22:10 »
fantastic write up mine needs doing in next 6 months armed with them picys going give it ago

thanks mick.  :D

Offline solihull-mick

  • Posts: 986
  • Attack: 100
    Defense: 100
    Attack Member
  • Karma: +0/-0
  • Referrals: 0
Re: 300TDI Cambelt Change Step By Step With Pics
« Reply #5 on: November 09, 2008, 13:05:19 »
Good man andy, just take your time, its not hard, just makle sure all the marks line up perfectly,
300 TDI Commercial Disco, ( Recovery & Parts Hack )
Series 2A Hybrid TDI( Bessie)
Mk1 escort RS2000 (my baby)
MK6 Fiesta Zetec s (wife gets the brand new car)

Offline GreedyGibson

  • Posts: 101
  • Attack: 100
    Defense: 100
    Attack Member
  • Karma: +0/-0
  • Referrals: 0
Re: 300TDI Cambelt Change Step By Step With Pics
« Reply #6 on: January 05, 2009, 20:38:01 »
great write up Mick :)

L reg Discovery 200Tdi
2" Lift Procomp shocks Golddigger rear dislocation cones
Extended brake hoses
Rebel 4x4 Steering guard and Diff Guard
1st Four Winch Bumper with Tmax EW9500 Winch and cast fairlead
Dual batteries with X eng split charge system
Safari Snorkel
31.10/50 x 15 Broco Grizzly Claws On silver Modulars
Homemade Rocksliders (ta Boss)

Offline davidlandy

  • Posts: 3568
  • Attack: 100
    Defense: 100
    Attack Member
  • Karma: +0/-0
  • Referrals: 0
Re: 300TDI Cambelt Change Step By Step With Pics
« Reply #7 on: January 05, 2009, 20:50:18 »
a brilliant write up Mick, very refreshing

Dave
Sniff, sniff, this mud smells funny

Offline Range Rover Blues

  • Moderator
  • ***
  • Posts: 15218
  • Attack: 100
    Defense: 100
    Attack Member
  • Karma: +3/-0
    • South Yorkshire
  • Referrals: 0
Re: 300TDI Cambelt Change Step By Step With Pics
« Reply #8 on: February 22, 2010, 21:11:00 »
Can I just ask, you line up the crank position by sigth through the wading hole, so you manage to lock it without the special tool.  Is there any risk it might move?

Also, you have the fuel pump timing pegged, don't you have to do likewise with the camshaft pulley?

Do you find drill bits accurate enough for the 9.5mm pegs? (the blunt end, not the sharp end)

Thanks for another great article :thumbup:
Blue,  1988  Range Rover 3.5 EFi with plenty of toys bolted on
Chuggaboom, 1995 Range Rover Classic
1995 Range Rover Classic Vogue LSE with 5 big sticks of Blackpool rock under the bonnet.

Offline muddydisco

  • Posts: 307
  • Attack: 100
    Defense: 100
    Attack Member
  • Karma: +0/-0
  • Referrals: 0
Re: 300TDI Cambelt Change Step By Step With Pics
« Reply #9 on: February 25, 2010, 07:06:08 »
There always a chance that the crank mint move :). But you can get the crank locking peg for about a fiver on its own  :cool:.
YOU BEND IT YOU MEND IT

Offline solihull-mick

  • Posts: 986
  • Attack: 100
    Defense: 100
    Attack Member
  • Karma: +0/-0
  • Referrals: 0
Re: 300TDI Cambelt Change Step By Step With Pics
« Reply #10 on: March 02, 2010, 20:46:55 »
Can I just ask, you line up the crank position by sigth through the wading hole, so you manage to lock it without the special tool.  Is there any risk it might move?

Also, you have the fuel pump timing pegged, don't you have to do likewise with the camshaft pulley?

Do you find drill bits accurate enough for the 9.5mm pegs? (the blunt end, not the sharp end)

Thanks for another great article :thumbup:

You dont have to use the wading hole, there is a great big arrow inside the timing case, this points to the woodruff key on the crank shaft, no peg needed on the cam, that lines up with its own mark never moves, and a 9.5mm drill is fine for the injection pump, just remember to undo the 3 10mm headded bolts on the injection pump to allow cambelt slack to move round to the tensioner side,
300 TDI Commercial Disco, ( Recovery & Parts Hack )
Series 2A Hybrid TDI( Bessie)
Mk1 escort RS2000 (my baby)
MK6 Fiesta Zetec s (wife gets the brand new car)

Offline Jay_disco

  • Posts: 57
  • Attack: 100
    Defense: 100
    Attack Member
  • Karma: +0/-0
  • To Infinity And Beyond!
  • Referrals: 0
Re: 300TDI Cambelt Change Step By Step With Pics
« Reply #11 on: March 07, 2010, 16:53:55 »
great info mick. but i think ill let you do tis job on my 200! least i know its gonna be done spot on.  :dance:

Offline MattDilley

  • Posts: 20
  • Attack: 100
    Defense: 100
    Attack Member
  • Karma: +0/-0
  • Referrals: 0
Re: 300TDI Cambelt Change Step By Step With Pics
« Reply #12 on: March 08, 2010, 22:54:26 »
Hi,
really impressed with the post, hope it goes as easy for me as it looks in the pics.
Can anyone tell me where the best place is to get a cambelt kit from? And any idea of the cost?

Matt
If it still workx, why fix it??!!

Offline Range Rover Blues

  • Moderator
  • ***
  • Posts: 15218
  • Attack: 100
    Defense: 100
    Attack Member
  • Karma: +3/-0
    • South Yorkshire
  • Referrals: 0
Re: 300TDI Cambelt Change Step By Step With Pics
« Reply #13 on: April 30, 2017, 21:18:10 »
As I'm doing yet another one, long story :angry: I thought I'd check something.

Assuming anyone ever finds this, when you line up the cam belt pulley, there's a mark on the pulley and the casing right?  well once the belt is tensioned this doesn't line up.  It was the same last time I did one of these but I'd had the chance to mark it with paint before I started, sadly this time the belt broke :cry:.

As it looks to be half a tooth out, do I advance it or retard it?


Blue,  1988  Range Rover 3.5 EFi with plenty of toys bolted on
Chuggaboom, 1995 Range Rover Classic
1995 Range Rover Classic Vogue LSE with 5 big sticks of Blackpool rock under the bonnet.

Offline Range Rover Blues

  • Moderator
  • ***
  • Posts: 15218
  • Attack: 100
    Defense: 100
    Attack Member
  • Karma: +3/-0
    • South Yorkshire
  • Referrals: 0
Re: 300TDI Cambelt Change Step By Step With Pics
« Reply #14 on: June 11, 2017, 01:23:41 »
I finished the job and it runs fine.  What I discovered is that the timing mark should line up before you tension the belt, as you tension it the timing mark may drift out slightly and this is normal.  Once tensioned the timing gear should then be slightly anti clockwise.  mine was about a quarter of a tooth but he last one I did was nearer half a tooth.

I've never been able to find out how the timing is set on the camshaft pulley.  It is adjustable but no manual I've seen has the procedure.
Blue,  1988  Range Rover 3.5 EFi with plenty of toys bolted on
Chuggaboom, 1995 Range Rover Classic
1995 Range Rover Classic Vogue LSE with 5 big sticks of Blackpool rock under the bonnet.


SimplePortal 2.3.5 © 2008-2012, SimplePortal